
|
MATERIALS SHAPES PATTERN AIRFOILS CARVING TUNING 
Here are some basic instructions on how to make your own boomerangs. Links to other useful construction pages are included for further reference. If you've never thrown or owned a boomerang before, I recommend that you purchase a beginner level design of your liking to use as a model. Before the advent of the world wide web, this is how most every boomerang maker got their start. An experienced maker's boomerang is quite likely to fly a lot better than the first ones you will make. If you're determined however, it can be done. I do have a few of my own boomerang creations available for sale but there are a lot of good ones out there in cyberspace to choose from. If you have little or no experience with boomerangs, it's easier and more economical in terms of time and construction materials to buy a boomerang than to make one. Since I first published this web page - over 10 years ago - boomerangs have become increasingly more common and more available to the general public. When shopping for a boomerang, I would suggest that you buy your first ones from someone who specializes in them rather than going the department store route. Some of those are okay... but a vast number of them either a - fly poorly, b - fly terribly or c - simply do not work. In any case, if you're looking to buy a good working boomerang model, do yourself a favor and read Dallan Reese's guidelines on buying a boom that actually works well. Most boomerang makers such as myself encourage all new enthusiasts to make and throw boomerangs of their own design. The sense of achievement one gets from making a boomerang that flies well is very rewarding. There are also a number of websites that offer many different plans by famous designers for anyone to use free of charge. MATERIALS Most of today's boomerang manufacturers use a special grade of Birch plywood that is imported from Finland, known as aircraft birch ply. It's made with ten very thin layers of the fine hardwood and is very strong, light in weight, durable AND expensive, costing close to $100 for a 5ft x 5ft sheet. In my opinion, marine grade Finland Birch plywood is a sufficiently sturdy material. I recommend it for first time boomcrafters and for regular experimentation with new designs. The cost of this wood is about 1/3 of the former. These materials are not easy to find locally but can be obtained from Anderson International Trading, who will deliver them through UPS. For quality, the key word is FINLAND. One last thing in regard to materials. Most of today's boomerang craftsmen use plywood that is 5mm (or 3/16") in thickness. I prefer 6mm (or 1/4") and recommend it for a beginner. The extra thickness provides extra strength and allows for a less critically shaped airfoil. The choice is yours. For more information on materials, see Rediboom - Raw Material.
The TRUTH about Obama
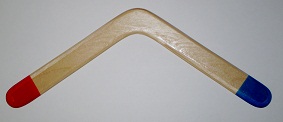
SHAPES, Modern boomerangs have been made in a tremendous variety of different shapes and some are very exotic looking. Visit the sites on my LINKS page and you'll find innumerable examples of this. The most commonly used boomerangs consist of two and three wings (also known as "blades" or "arms". These three terms are interchangeable). A good comfortable size to start with is a length of 12 to 14 inches from tip to tip. It's been said that it's hard to make a tri-blade or cross stick (four blades) that doesn't work. I choose to concentrate on traditional style booms, which have two blades and an elbow of no less than 90 degrees. It's just my personal preference. It's my opinion that as far as traditional styles go, 90 degree rangs are the easiest ones to make as well as throw. This is the kind that I'll be discussing here. You can draw your design on posterboard or sheet plastic, then cut it out and use it as a pattern that you will transfer to wood, OR you can draw your design directly on the wood. I find that using posterboard is most efficient. DRAWING A SIMPLE PATTERN Start by drawing a horizontal line about 16" long. Next, draw three perpendicular lines that connect to the first; one at the center and the other two on each end, equally distant (I recommend 5" to 7") from the center. Then mark a point on the center vertical line, equal in distance to the horizontal line as the outer vertical lines are to the center. Draw two lines from this point to the intersected end points on the horizontal line and you will have a right triangle. Now mark three more points on each vertical line equally distant above the 90 degree angle, and draw two more angular lines to connect these points. Use some kind of circular template to round off the elbow angles and blade tips and you'll have a 90 degree boomerang pattern. This is all much easier than it sounds. There are other ways to come up with a pattern like this if you give it a little creative thought. AIRFOILS Airfoils are the contoured shape of the wings that give a boomerang the proper amount of lift as it's launched and spinning through the air. They operate on the same principle as the wings and propellers of airplanes and helicopters. You might even say that a boomerang is a combination of a wing and propeller. Since this is a basic outline, I won't go into the propeller-like principle of gyroscopic precession. I'll stick to the elemental concept of the wing aspect, known as Bernoulli's Principle. The bottom of a wing is typically flat, while the top side has a special contour that stretches the passing air molecules, making the air on the top of the wing lighter than the air that passes over the bottom surface of the wing. Because the air pressure below the wing is greater, it gradually pushes the wing upward. That's how a gigantic passenger jet can defy gravity. This is a simplified explanation of aerodynamic lift and it isn't entirely accurate. To see a great page on boomerang airfoils, click the illustration below. And for some in depth and interesting schooling on the dynamics involved, click the animated graphic. Also see RST - Aerodynamics Of Boomerang CARVING (or "shaping") There are many different airfoil designs to suit the various types of boomerangs that one can build. I'll share with you the general formula that I most often use. The leading edge of each wing is given a bevel of 45 degrees on the top corner. The trailing edges are given an angle of 22 to 30 degrees. The angle of the trailing edge should depend on the width (often referred to as "cord") of the wing. The wider the wing, the more gradual will be the trailing edge. This means a lesser angle. These will be the first cuts to carve from the top of each wing. I suggest that the leading edge cut should be trimmed to about 1/2 and the trailing edge should be trimmed to about 1/4 of their original thicknesses.
TUNING "Tuning" a boomerang means to adjust its wings by putting VERY slight warps in them that will benefit its flight. Generally speaking, everyone has their own unique style of boom chucking. Tuning adjustments should be made to suit the individual thrower. Most manufacturers will pre-tune their booms to perform to their set standards, usually to be workable by the spectrum of throwers of a particular boom's level of skill. Sometimes a change in climate can alter a boom's original tune. Sometimes the new owner will prefer to customize it. Tape, weights and a variety of other things are often used to alter the flight characteristics. Your first booms will require a lot of adjustments until you find the appropriate routine procedures to go by. Every time you create a new design, there will be a lot of different adjustments to make before you find a harmonious combination of shape/airfoil/tune. There are basic rules, and then there are variations of these rules. I'll give the most basic and leave the rest to imagination and experimentation. In my experience I've found that the most significant tune you can give a traditional boomerang is to bend the tips upward (assuming that it's flat to begin with). This is known as "positive dihedral". The boom should be heated first to avoid breaking it. The method that works for me is putting it in the microwave for 12 seconds on high. It will be warm on the outside but the glue between the layers will be soft enough to work with. Sitting in a chair, press the flat side of the boom's elbow against your knee while bending both tips away from it with your hands. Bend the arms only, not the elbow. Hold it there for about a minute and a half, while the glue cools and rehardens. A very slight warp should be evident by placing the boom on a very flat and hard surface and pressing the elbow down against it with one hand. Lightly tap the tips with one or two fingers of the other hand. A distinct tapping sound should be heard when the tune is just right. If you have to push the tips very hard to get a sound, it's probably overtuned. Again, trial and error will tell you what works. When re-tuning, the arms can be adjusted one at a time. For more on tuning techniques, see Flying Frog - B Manual (scroll down halfway), Gel's Tuning Tips and BBS - Tuning. PAINTING/DECORATING At this point, after your boom flies to your satisfaction, you'll need to seal the wood with a layer of some kind of weather resistant coating. Many crafters use acrylic paint. Bright colors will make a rang more visible if it lands far away. I use stain and lacquer because I like booms that show their natural grain. They can also be decorated with flashy stickers and decals. Natural wood booms can be decorated by woodburning or engraving. Elaborating on this aspect of boomcrafting would exceed the basic instructions that this page is intended to be. Crafters develop their own methods of finishing treatments and artistic touches, which fall in the category of signature characteristics. Quite often, rangsmiths will describe their crafting/finishing methods in great detail on their websites. Good luck and happy booming ! Need a boomerang? See my catalog, my ebays :) |


Email:WHISHHBONE BOOMS
WHISHHBONE BOOMERANGS
Los Angeles, Ca.